
Three steps – one light. A guide to perfect portrait lighting every time
Capturing the perfect portrait requires careful consideration of lighting. While multiple-light setups can create stunning results, mastering the art of portrait lighting with a single light can be equally impressive (and a lot more affordable if you are just dipping your toes into pro lighting gear).
In this article, we will explore a three-step guide to achieving flawless portrait lighting using only one light source. Whether you're a beginner or an experienced photographer, these steps will help you create striking portraits that truly showcase your subject's beauty and personality using just one light.

Understanding and working with your light source
Before we dig in, we need to talk a bit about light sources. There are so many different types of light modifiers (tools used to make the light source larger eg. a large umbrella or softbox) in photography, that it can be overwhelming to try and pick the right light to help you achieve your portrait goals.
In all of the lighting setups that you will see in this tutorial, the monolight (flash) is an Elinchrom 500 with low to medium power. You'll learn how you can achieve beautiful portrait lighting with one light, even with different styles of lights, by adjusting or changing the lighting modifier.
Different kinds and sizes of light modifiers
We're going to look at three different sizes and kinds of light modifiers and the results from each.
#1 – A large source like a wide umbrella. Large sources, like the 7′ Westcott umbrella (shown below) produce flat, even light that has a wide spray of light. This lighting is easy to manage and is an excellent choice when you are photographing full-body portraits, action shots (like dancers), and when you need your subject/s to appear friendly.

#2 – Medium-sized sources like the Elinchrom Rotalux Deep Octabox (70cm / 27.5″) produce a rich, higher-contrast light, but they still have a wide enough spread to flatter most body and skin types. The depth of the softbox throws a more narrow spray of light, making it possible to curate shadows and provide a more dynamic portrait for your subject. Seen in the image below, on the left.

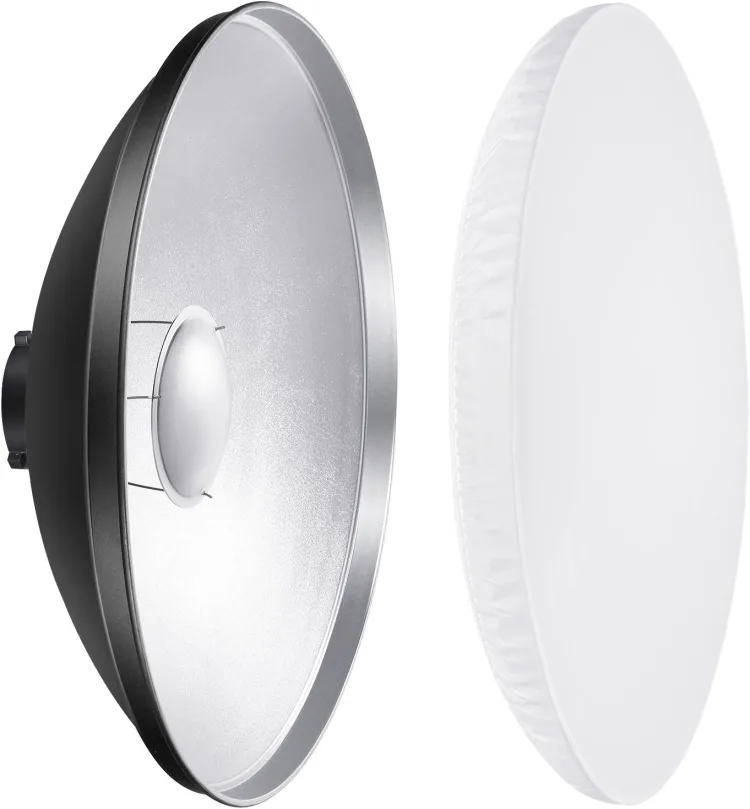
#3 – The last light source we will explore is a beauty dish (above center, and below), which is smaller, and therefore produces a harder light. The beauty dish is a strong choice for models, and can effectively be used for dramatic portraits that need a bit more edge.
With each step, you'll see a different light source and how to apply the same three steps. Doing so, you'll learn how each lighting style differs but still produces a captivating, perfect portrait with unique qualities and dimensions. Finally, you'll learn why you may choose one option over another.
Let's get started!
Step 1: Placing your light source
Position your light source directly in front of your subject, pointed slightly down (about a 45-degree angle), with the base of the light at eye level to the subject. This is the main light, also called a key light, as it provides the primary light on the subject.
It's important not to position your light too high above your subject's eyes. This will create deep shadows that are difficult to fill with reflectors, and you will lose the beautiful catchlight (the light reflecting in their eyes – this is a good thing!) your light modifier creates.
Place the light between three to four feet away from the subject.

Step 2: Clamshell reflections
Add a large, round, white reflector below your light. The effect of the light and the reflector will resemble an open clamshell.
Your key light will provide a spray of light that you can bounce and craft using reflectors. The clamshell reflector will help fill in deep shadows under the chin that can be unsightly or severe for a standard portrait.
Note from Darlene: Be careful, however, not to light the neck or chin of someone who is plus-sized or has a double chin. Doing so will highlight it and make it more prominent (NOT what they want). For those people, this kind of lighting is not the best choice.
The easiest way to know how high the reflector should be is to have the subject hold it at about waist level, then secure it using your reflector stand (as seen below). The reflector should also be at a 45-degree angle toward your subject, bouncing the light up at their chin.

The second significant benefit of using a large reflector just below the key light is the beautiful catchlight that will bring life into the eyes of your subject.
If you find that you'd like even more shadows filled in for a brighter, bolder look, use the silver side of your reflector. This look is strong and spicy, and often used in actor headshots. The bright reflection can create a pop of contrast when paired with a deeper softbox like the Elinchrom Rotalux Deep Octabox used in the second example.
TIP: If you don't have a large, round reflector, don't worry – there are other ways you can effectively reflect light and still achieve a soft, attractive portrait. Head to your local hobby store and pick up a mid-size foam-core board from the craft or frame section. They are usually coated with a semi-reflective gloss and they make wonderful, soft light reflectors. While the catchlights in your subject's eyes will not be round, the eyes should still pick up the shape of your reflector and help fill in deep shadows.
Step 3: Create a lifesize lightbox
Fill in shadows even more by using large white V-flats (2 large white foam-core boards attached to form a vee shape that can stand up on its own) on either side of the subject to create a sense of friendliness and warmth of personality. When you create a box, or cage, of reflection, your subject will be lit evenly from all around.
V-flats have a wonderful way of reflecting enough light to keep your image balanced. For example, in the photos in this article (and the behind-the-scenes photo below), you can see that the key light provides the majority of light, followed by the clamshell reflector, and then the soft light reflected by the V-flats.

Often, new photographers don't realize how important light balance is for an attractive portrait. You wouldn't want the light coming from the sides or bottom to be stronger than your key light. Using the reflectors in this way will allow your portrait to be well-balanced for a powerful, yet beautiful portrait.
Portrait examples using the different light modifiers
Using the three lighting steps outlined above, let's see how each type of light modifier behaves beautifully, crafting unique, but powerful portraits.
The 7′ Westcott Umbrella provides a nice, even, flat light. When the subject or client needs portraits that are well-lit, approachable, or bright and friendly, a large light modifier is a great option.


The 70cm Rotalux creates slightly more definition with a narrower spray of light. This light works very well for headshots or portraits that need some interest, but not too much drama. When you combine all three rules, the light softens the shadows enough to still be flattering to all body types and skin tones.


A beauty dish is up next! The size of this light source is much smaller, producing a harder light that you can see under her nose. However, when you add the reflector and V-flat box, the shadows fill in and create a lot of interest in the portrait. Use this type of light source when you need more drama and punch!


A few other important things to note
Make sure you understand your camera settings. While every camera and monolight will have unique requirements for a good portrait, a safe place to start would be low to medium power on your monolight, and camera settings similar to these: ISO 200, shutter speed 1/250th (or 1/200th depending on the camera flash sync speed), aperture f/9.

One of the best parts about creating portraits using only one single light is that you can achieve this look practically anywhere you have a small open space. The area used to create images in this article was my living room between the kitchen island and the pool table.
You don't need much room, but it's important to note that ceiling height does matter. The higher, the better! If you don't have high ceilings available in your home, search for a foyer you can obtain permission to use, a garage with some head space, or a covered porch. You could even ask your subject if their home has a space that might work for their portrait.
The goal of this article has been to show you how, with nearly any light source, you can get stunning portraits following just three simple steps! These same rules would apply to rectangular softboxes, octaboxes, or even constant (continuous or LED) lights.
If you are just starting with professional studio lighting and aren't sure what type of light modifier you should get, I recommend something in the middle range. A three to five-foot double diffused softbox is a wonderful way to take winning images with just a bit of practice.

If you want to see another photographer's techniques for making portraits with one light, watch the video below from Tommy 4k. He does a really good job of demonstrating and explaining how to set up the light.
If you need to purchase lighting gear check out this list of recommended equipment that I put together for you. I use Godox speedlights, studio strobes, and remote triggers and I love them! – Darlene

