
This topic comes up every time I do a photography workshop or class. Creating a good system to safely store your images and having a backup plan to recover them if disaster strikes are so important. Many people fail to do it because it can be a bit overwhelming and confusing.
So in this article, I’ll go over the system I use for saving and backing up my images. In addition, I’ll give you some tips and resources to help you do the same. Let’s make sure you have your files safely stored away and your butt covered just in case!
Here is what we’re going to cover:
- Use one main drive for all your original image files.
- Have a second drive #as a backup copy of everything on your main drive.
- Have a third copy off-site (another drive or in the cloud).
- Backup your LR catalog separately (on a different drive) regularly.
- Put your working LR catalog on your computer, not an external drive.
- Think about where you put your images and create a logical folder and file structure.
- Rename your images appropriately.
#1 – Use one hard drive as the main one for all your originals
There are two potential scenarios here. Let’s look at each separately.
A) A laptop is your main computer

If you’re like me, and you primarily use a laptop, then what you need here is a good portable external drive.
Make sure you get one that has enough capacity so it won’t fill up too quickly. Something like 2TB or 4TB will likely do the job for you.
Go slightly bigger than you think you’ll need so it lasts you a bit longer. We’ll call this Drive A.
IMPORTANT NOTE: Please note, NONE of my original images are saved on my laptop!! Zero, nada, zip, none! They all go on my main external drive which I’ll call Drive A.
As noted above, putting your original image files onto your laptop hard drive will fill it up really quickly, especially if you are shooting RAW format.
Look at the space used on your laptop’s drive. How much is left?
If your drive is more than 75% full, it will start to slow down. That is regardless of your processor speed or how much RAM you have.
The bottom line is this, do yourself a favor and get them off there and onto an external drive.
You can choose an external drive the sits on your desk and doesn’t move, or a portable one if you travel and want to take all your images along with you. I actually do a
combination of both.
I have one 12TB that sits under my desk and doesn’t move.
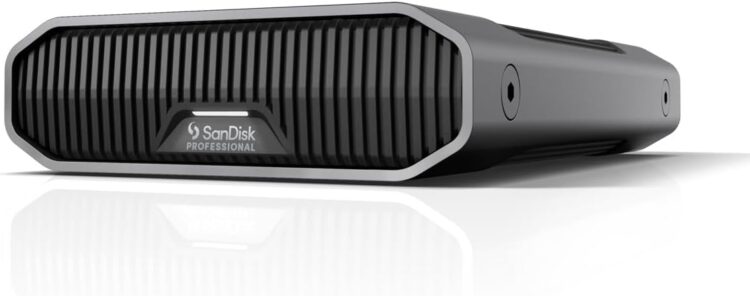
That’s bigger than you likely need, but if you can afford it, go for it. This is the one I use (below).
Then I have a Samsung 2TB SSD drive that goes with me when I travel or am teaching.
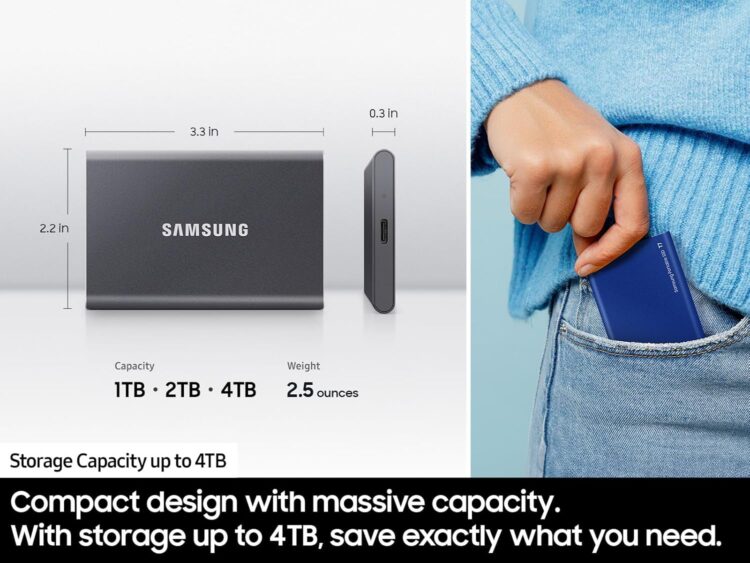
***Saving and backing up while traveling is an entirely another topic for a full article. But for now, just know that I have one 2TB drive that goes with me when I am away from my home office. I download my images to it when I’m on the road, then copy them over to my main 8TB drive when I get home. To be continued another day . . .
B) You use a desktop computer

If you mostly use a desktop computer, then everything above also applies to you, with one small caveat.
If you have a really large capacity drive on your computer, then you can consider storing your original images there. But just note that if it starts to fill up you’ll be in the same boat as a full laptop and you’ll need to get them off of there.
So ideally, the best plan for you is to also work with all external drives.
Leave the space on your computer for programs, the operating system, and documents. Then it will run faster and smoother for you when you do go to edit your photos.
Just to reiterate, unless you have a massive amount of storage space on your desktop computer’s hard drive (like 4TB or more) then I still highly recommend using external drives for your images.
#2 – Have a second drive as a backup of your main drive
Okay, once you’ve gotten your main drive set up, it’s time to start thinking about a backup plan.
The idea behind a good backup system is that it gets you back running again as quickly and easily as possible.
The first thing you need is another external hard drive – we’ll call this Drive B. You can get one the same size as your main drive, or slightly larger if you plan on backing your computer/laptop up there too.
Then you need a way to run the backup. You want to use software that you can program to run in the background or at night. There are many options, but they’re not all equal.
I am NOT personally a fan of Apple’s Time Machine or any of the other automated software programs that come with some drives (I think WD has one). The way some of them work is they save all your files as an archive, but you can’t actually look inside it to either check that it’s there or find a single file.

So I use something called GoodSync. It’s $29.95 CAD (less than $20 USD) per year, so there is a small added cost. But it’s easy to use and to set up, and it doesn’t do any funky things with your files – it just copies them where you tell it to do so!
#3 – Have a third copy of your images off-site
Nobody likes to think about their house burning down or a major disaster occurring, but it happens.
Even something like a lightning strike or power surge could knock out and kill all your electronics, including your hard drives. So it’s a good idea to be prepared for disaster before it hits.
There are two ways to make a third copy of all your images and get them off-site.
- Get another external drive and store it in a different location (at work, at a neighbor’s or family member’s house.
- Buy cloud storage and back them up online.
The first option is pretty straightforward.
What many people do is back up all their files from Drive A (main) to Drive B, and make another copy of them all to a third one, Drive C.
Then you just need to take Drive C to leave it in another location away from the other two.
So if Drives A and B are at your house, take Drive C to work, leave it at a friend’s house, or even get a bank safe deposit box and place it in there. Then periodically (monthly or weekly, depending on how often you have new images), swap out Drive B and C and update them both.

Cloud Backup Options
The other option can be a little trickier to implement or even choose a service.
But if you have a good internet connection, backing up to the cloud has never been easier. Here are a few of the options available:
- Dropbox
- Google drive
- Dedicated photography sites like SmugMug
- iCloud
- OneDrive (be careful with this one, it can cause issues)
- BackBlaze Computer Backup service

They have one service called Personal Backup, which makes a copy of your computer hard drive (and external drives if you set that up). But it only keeps files for one year after they disappear from your drive.
What that means is that if you delete something from your computer and Backblaze doesn’t detect the file anymore, it will delete that file after a year. You can extend that service longer as well, so make sure you read all the options carefully.
#4 – Back up your Lightroom catalog
These next two points only apply if you use Lightroom (or any other program that uses a database to store your edits) to process your photos. If not, skip down to #6.
One of the most confusing aspects of Lightroom is that it doesn’t actually have your photos inside of it. They are stored where you designate, and Lightroom keeps track of all the edits you want to apply to them.
Think of it this way, using cooking as an analogy.
If you want to cook a great meal, you need two things: a good recipe and the raw ingredients to make it.
Photo processing is exactly the same. When you edit your photos in Lightroom, you are creating a recipe for how you’d like to “cook” that photo. The,n when you export it, you are applying that recipe to the raw ingredients (raw file) and you get the finished JPG or whatever format you’ve chosen.
The point is that your raw ingredients are most likely in the fridge, and the recipe book is on the shelf – they do not live in the same place.
The same is true of your Lightroom catalog (recipe book) and your raw files (ingredients). It should look like this:

Notice I mentioned a backup for Lightroom above as well?
When you’re setting up a good backup strategy, you also need to remember to back up your Lightroom catalog.
If you’re not sure how to do that or where even find your catalog, go to your Catalog Settings in Lightroom (on Mac it’s under the Lightroom menu, on Windows, it’s under Edit).

Click “Show” and it you will be taken to your actual LR catalog file in Windows Explorer or Mac Finder.
Yes, mine says “repaired” and it is 2.31GB!
The other thing you need to do is to tell LR how often to backup and where to save the backup files.
As shown above, I recommend setting it to Back up catalog: Every time Lightroom exits. So when you close the program it will pop up and ask you the following:

See where it shows the Backup Folder location above?
That’s where it’s going to save this new backup This is the only time you can change the destination.
Do so by clicking on “Choose…” and selecting your external drive.
Do NOT put your Lightroom backups on your computer, that defeats the purpose.
Put it on your external Drive A, which then gets backed up to Drive B, which then gets copied to the cloud.
Staring to see a pattern here? Backup your backups!
Here’s the harsh reality. You don’t have a problem until you do. Then it will be a really big, ugly, messy, make you wanna cry problem unless you’ve followed these steps and have a good plan.
#5 – Your LR catalog lives on your computer
You’ll notice in my little diagram above that it shows your Lightroom catalog and the program itself both live on your actual computer.
That is correct.
Do NOT put the Lightroom app/program OR the catalog on an external or networked drive.
Lightroom doesn’t play well with networked drives at all, and running your catalog on an external drive isn’t optimal.
It will likely run slower, and could actually cause your drive to crash. The thing I know about hard drives is that it’s not IF they will crash and die, it’s WHEN. Right? Also the more times you write to a hard drive the shorter its lifespan. So by running the catalog on there you’d be constantly writing to the disk and stressing it out, increasing your risk of it crashing.
So always put your catalog on your computer’s internal hard drive.
#6 – Create a good filing system and folder structure
Setting up a good folder structure and filing system is something you sort of need to do at the beginning, but it’s not too late to start. If you have a mess now (meaning your image files are all over the place and you frequently have issues finding them) you can clean it up. But it’s going to take some thought and time!
There are two different thought processes and methods you can use to approach how you set up your folders.
- By date
- By name (location)
I use the latter and set up my folders by location or type of images. Personally, I find the date sorting method too confusing because I can never remember when I shot a particular thing or visited a certain area. Also if I’ve been to a place more than once, filing them by date doesn’t allow for seeing all my images from that location in one spot.
This is how mine folder setup looks:

In the screenshot above, notice that my top-level folder is called Photos, and all of my images are inside there in subfolders sorted by location or type of event. For my travel images, you can see inside that folder that I have many subfolders, with the name of the place or trip.
Also notice that I have all of my NYC images inside one main NYC folder, and then I have a subfolder for each time I’ve been there (outlined in red). Then inside that are yet more subfolders, which leads me to my last point . . .
#7 – Rename your images appropriately
Naming your files appropriately and properly will help you avoid mishaps, and help you find your images easier. If you aren’t sure what I mean, here are some of the potential issues and problems that could occur:
- Camera file names (like DSC_0001 for example) eventually repeat so you may end up with different images having the same file name. That could cause mixups and issues down the line.
- Searching for a camera file name is impossible. Do you know what DSC_8538.dng is a photo of? I sure don’t.
- Saving different versions (like small JPG, large JPG, etc.) of the same image using the same file name could cause confusion or one to be accidentally overwritten.
So what I do is rename all my files after I’ve imported them all from one session, trip, etc. I use the location name, sometimes the year, and a 4 or 5 digit sequential number at the end. For example, NYC-2018-0004.dng as you can see below.

Then I have created Lightroom presets to name my exported files according to what size they are, or where they are being used (online, print, etc.).
As you can see above, I have exported full sized JPGs and put them into a subfolder with the same name. In addition, I have also added a little extension to the file name so I know what these files are for at a glance.
It’s really easy to mix up files and grab the wrong ones for online use, versus ones to send to be printed. If you try and print small files that will not work out well, and if you post full sized ones online that’s another problem. Not only will they take too long to upload, but your full images are then available for anyone to take.
The time is now to set up a good system!
Now it’s your turn. I hope you have found it helpful to see how I do things.
Trust me when I say I was not always this organized or diligent about saving and backing up my files. But then I had an incident and a bit of disaster. I was able to recover all my image files but it was really stressful and took a lot of time and effort.
With the system I’m using now, I can quickly and easily find my files and recover any of them quickly if either of my computer or hard drives crash.
If you have any questions please post them in the comments below and I’ll try to help you out. Post a screenshot of the issue if you can to show the problem.
Cheers,

