
If you’ve been searching for a Luminar Neo review to decide whether this AI photo editor is finally worth it — the short answer is: yes, for the right photographer, it’s better than ever.
Hi, I’m Darlene Hildebrandt, and I’ve been using Luminar since its early days — and helping thousands of photographers learn editing with it. In this review, I’ll walk you through what Luminar Neo is, what’s new, what works great (and what still needs work), and how it compares to tools like Lightroom or Photoshop.
TL/DR: Our verdict: 4/5 stars. Luminar Neo works best for learners who value simplicity, clarity, and control over their photos — not software frustration. In this review, we explore why it’s perfect for beginners, non-techies, photo restoration enthusiasts, and creatives switching from Adobe — and where it still has room to grow.
Whether you’re an editing beginner, a hobbyist, or a photographer finally fed up with Adobe subscriptions — this review will help you decide if Luminar Neo is the right fit.
Note: This post contains affiliate links. If you choose to purchase Luminar Neo using a link on this page, I earn a small commission. There is no increase in the price for you.
Save 10% on Luminar Neo
Use discount code DPM10 when you checkout, to save 10% on your entire cart
Table of Contents
What is Luminar Neo?
Luminar Neo is the current generation of photo editing software created by the folks at Skylum. Previous versions include Luminar AI, Luminar 4, and Luminar Flex.

Luminar Neo is a complete solution with a full raw photo editing workflow as stand-alone software, OR you can use it as a plugin for Photoshop, Lightroom Classic, or Apple Photos and incorporate it into your existing workflow.
Minimum and recommended computer specs

As with every photo editing software, there are minimum computer requirements for running Luminar Neo, and recommended specs for best performance.
Minimum requirements Mac
These are the minimum system requirements to run Luminar Neo on a Mac computer.
- Mac Model: MacBook, MacBook Air, MacBook Pro, iMac, iMac Pro, Mac Pro, Mac mini, early 2010 or newer
- Processor: CPU Intel® Core™ i5 or better
- OS version: macOS 10.14.6 or higher.
- RAM: Memory 8 GB RAM or more (16+ GB RAM is recommended)
- Disk space: Hard disk 10 GB free space; SSD for best performance
- Display: 1280×768 size or better

Minimum requirements Windows
These are the minimum system requirements to run Luminar Neo on a Windows computer.
- Hardware: Windows-based hardware PC with mouse or similar input device
- Processor: CPU Intel® Core™ i5 or better, AMD Ryzen™ 5 or better
- OS version: 10 version 1909 or higher (only 64-bit OS)
- RAM: Memory 8 GB RAM or more (16+ GB RAM is recommended)
- Disk space: Hard disk 10 GB free space; SSD for best performance
- Display: 1280×768 size or better
- Graphics: Open GL 3.3 or later compatible graphics card

My recommendations for computer hardware
Always get the biggest, best, fastest, the most pimped-out computer you can afford. That is how I approach buying a new computer for photo editing – MAX out everything!
What that might look like is as follows?
- Get an i9 Intel or M1 or M2 chip computer if you can swing it. The newer the better, the faster the better. I have an i7 but my next upgrade will be to a Mac M2 likely.
- Put in the maximum amount of RAM your computer can hold (make sure both sides are even so two 32 GB chips for example). I have 64 GB.
- Make sure your hard drive is also large enough and keep it as empty as possible. I have a 2 TB SSD internal drive and I keep it no more than 30% full (there is 1.4 TB of free space).
- The graphic card matters too! A lot! This is the piece of hardware that allows your computer to display images and how they appear. The better, faster, bigger, graphics card you get the better any imaging software will run.
What’s New in Luminar Neo (Versions 1.17 to 1.27)
Since our last review when it first came out, Luminar Neo has gone through massive upgrades. Here’s a quick overview of the most important new features:
Auto Adjust (v1.24)
One-click exposure, highlight, shadow, and curve adjustments using AI — great starting point for most edits. It’s fast and surprisingly good, though sometimes you’ll still want to fine-tune afterward.
GenExpand (v1.17)
Extend the edges of your photo with AI-generated content that blends seamlessly — think of it like content-aware fill on steroids. Amazing for reframing landscapes.
GenSwap & GenErase Improvements
Swap or remove objects with more accuracy and cleaner blends. Still not perfect for detailed areas but much better than before.
Atmosphere AI 2.0
Now includes depth mapping, meaning fog and haze effects wrap more realistically around subjects. It’s subtle but powerful, especially for landscapes.
Water EnhancerAI & Twilight EnhancerAI (v1.19)
Two new tools for landscape shooters:
- Water Enhancer fine-tunes the tone, depth, and color of water.
- Twilight Enhancer brings golden/blue hour glow back into your scenes.
Color Transfer Tool (v1.21)
Match the color palette of one photo to another. Want your photo to look like a Wes Anderson movie or a sunset from Morocco? Now it can.
Smart Search + Catalog Improvements
Search for objects like “Christmas tree” or “cat by window” in your photo library. Also: virtual copies, custom filters, new filmstrip view, faster performance.
Export Presets + DNG Option
Quick exports now include options for full-quality JPEG, TIFF, and DNG. Plus you can re-use last settings or export faster than before.
Cache Cleanup & Catalog Optimization
New tools to reduce bloat and speed up Luminar’s performance on machines with limited space.
And more: updated UI, faster masking, support for the latest cameras, improved slider behavior, and Preset previews.
Light Depth Tool (Fall Update October 2025)
Light Depth debuts with fine-tuned, zone-based lighting control, surpassing Relight AI by letting users place and blend light exactly, improving subject focus and mood instantly.
What’s New in the Luminar Neo Spring Update (v1.27)
The spring 2026 update shipped April 9th focuses on two areas: enhanced portrait editing and a more seamless cross-device workflow. Here are the three most notable changes.
Bokeh AI: Now Available on Any Image
Portrait bokeh has been renamed Bokeh AI and is no longer limited to portraits. You can now apply background blur with depth mapping to landscapes, pet photos, flower images, or any subject.
The depth mapping is the real improvement here. Instead of a flat blur, Bokeh AI reads the depth information in the scene and applies progressively more blur as distance increases, the same way a real lens does. You can also control bokeh shape (round, hexagon, stars, hearts), though for natural-looking results I recommend sticking to round or hexagon.
Where this tool genuinely excels over the standard blur tool is complex depth scenarios. Blurring the background behind a cluster of trees or layered landscape elements would require significant masking work manually. Bokeh AI handles it in seconds.
One current limitation: you cannot yet push the depth plane backward to also blur the foreground. The brightness and color tint controls that were in the older portrait bokeh tool are also absent in this version. Hopefully Skylum brings those back.
Portrait Tool Upgrades
Three meaningful improvements landed in the Face AI and Skin AI tools:
Dark Circle Remover was already in Luminar Neo, but the v1.27 version works noticeably better. The results on test images are clean without the washed-out look the older version sometimes produced.
Blemish Removal has been upgraded from a simple on/off checkbox to a full slider. You now control the amount of blemish removal rather than applying it at full strength or not at all. More importantly, the AI is now better at distinguishing blemishes from freckles and skin texture. In testing, it left freckles intact and glitter untouched while removing actual blemishes, a meaningful improvement for portrait photographers.
Body Skin Smoothing is new. Previously, skin smoothing applied only to the face, which left a visible disconnect at the neck. The new body smoothing slider addresses the neck and other exposed skin areas, giving you a consistent result across the full portrait without extra masking work.
One thing to note: in testing, the body smoothing did not always reach skin on the chest or arms. Blemishes in those areas sometimes had to be handled manually.
Still far less work than starting from scratch.
Masking: Feather and Shift Edge Sliders
This is the biggest workflow improvement in the update for non-portrait work.
Under Mask Actions in every masking tool, there are now two new sliders:
- Feather: softens the mask edge. Replaces the need to manually brush a softer transition.
- Shift Edge: expands or shrinks the mask boundary. Useful for pulling back a mask that’s bleeding into the background, or enlarging one that stopped short of your subject’s edge.
These two sliders are available on every tool where masking is present, including object select, radial gradients, and brush masks.
The practical impact on the radial gradient limitation worth noting: you still cannot reposition a radial gradient after applying it. But you can now go back to the mask and adjust the feather and boundary after the fact. That addresses part of the long-standing request from users who wanted more control post-application.
Watch my entire Luminar Neo Masking Tools video update about it.
What About Extensions in Luminar Neo?
Since launching Neo, Skylum has added a suite of optional Extensions to expand its capabilities. These include:
- HDR Merge – Combine bracketed exposures into a single high dynamic range image.
- Focus Stacking – Blend multiple images with different focus points into one sharp photo.
- Upscale AI – Enlarge your images using artificial intelligence without losing sharpness.
- Supersharp AI – Fix minor motion blur or focus errors.
- Noiseless AI – Remove noise with better control than standard denoise tools.
- Panorama Stitching – Merge multiple images into a wide pano.
Note: Some Extensions are only available via the Pro Subscription or Creative Journey Pass.
These updates alone make it worth revisiting any older Luminar Neo review — because the software has matured significantly since its launch.
If you’re doing advanced workflows like product photography, landscapes, or macro work — these add-ons can be extremely helpful. I personally use HDR Merge and Focus Stacking regularly for travel scenes with tricky lighting or deep depth of field.
Cataloging and DAM: Where Luminar Neo Still Falls Short
I’ve worked with a lot of students who struggle with file organization — and this is still the weakest part of Luminar Neo.
Neo’s cataloging system is lightweight, but not full-featured like Lightroom. Here’s what you can and can’t expect:
What works:
- Organize images in folders or albums
- Flag, star, and color-label images
- Use Smart Search to find photos using keywords or even object recognition
- Create virtual copies for editing variations
What’s missing or limited:
- No smart collections or auto-sorting rules
- No face recognition
- Folder-based only (no cloud sync or advanced database tools)
- Metadata editing is minimal
If cataloging and organization are a major part of your workflow, Lightroom still wins hands down. But if you just need to import and edit a folder of RAW files with basic sorting and tagging, Neo is sufficient.
Darlene’s Insights on Cataloging (What Most Users Miss)
One of the most common pain points I hear from students is, “Where did my edits go?” or “Why is my catalog so huge?” So here’s what I’ve found in practice:
- Thumbnail cache bloating: I once had a Luminar Neo catalog grow to over 35GB — and it only had 500 images in it. Neo was building large previews in the background, and unless you go into the Settings to limit cache size, it will keep growing. When I used the new cache cleanup tool, I dropped that same catalog to under 5GB. Huge difference.
- Cataloging confusion: Neo allows you to browse folders directly or catalog them — but the behavior isn’t always clear. I’ve had students accidentally catalog their entire hard drive, which not only creates a massive preview folder but can slow Neo to a crawl.
- No version history like Lightroom: Neo uses non-destructive editing, but it doesn’t store a full history log. If you close the program and come back later, you’ll see your edit results — but not the step-by-step changes. There’s no slider history or timeline like in Lightroom’s develop module.
- Sidecar files and Neo file types: Edits are stored inside Luminar’s internal catalog database, not as sidecar .xmp files like Lightroom. If you move your images outside of Neo, you’ll lose edit data unless you’ve exported the final version or are moving the entire catalog folder.
- Import is simpler, but not smarter: Neo doesn’t require importing images like Lightroom does — which can be a plus — but also means you don’t get powerful import presets, metadata templates, or auto-sorting rules.
If you’re brand new, this simplified system might be a good starting point. But if you’re transitioning from Lightroom and expecting robust DAM tools, you may be frustrated by what’s missing — or worse, confused by what’s happening behind the scenes.
I’ve worked with a lot of students who struggle with file organization — and this is still the weakest part of Luminar Neo.
If cataloging and organization are a major part of your workflow, Lightroom still wins hands down. But if you just need to import and edit a folder of RAW files with basic sorting and tagging, Neo is sufficient.
Can You Use Luminar Neo as a Plugin?
Yes — Neo works both as a standalone app and as a plugin for:
- Adobe Lightroom
- Adobe Photoshop
- Apple Photos (macOS only)
You can also launch Neo from Lightroom or Photoshop and return the edited image back into your workflow — which makes it easy to add AI tools like Sky Replacement, Portrait AI, or GenExpand to an existing Adobe workflow.
However, not all tools or extensions are accessible when used as a plugin. For full power, launch Neo directly.
Note: Luminar Neo previously worked as a plugin for Affinity Photo, but as of version 1.19 it is no longer supported.
Real Before & After Results (With Luminar Neo Tools)
Atmosphere AI 2.0 (Depth Fog Mapping)
Atmosphere AI 2.0 is now smart enough to fog up the background behind the subject and leave the subject clear. That’s the kind of depth control that makes a tool go from gimmick to usable.


Notice how the fog wraps behind the subject, maintaining foreground detail and realism.
GenExpand (Image Reframing with AI)
GenExpand let me widen a panorama by filling in the top with sky


Useful for adding breathing room around a subject or reframing without cropping in tight.
Color Transfer Tool (v1.21)
Want your photo to look like a Wes Anderson movie or a sunset from Morocco? Now it can.


Water Enhancer AI (v1.19)
AI-powered tool to fine-tune water color, contrast, and clarity — perfect for seascapes, lakes, and dynamic action shots like surfing.
I tested Water EnhancerAI on an image of a surfer cutting through a wave, and it made a dramatic difference — pulling out more vibrancy in the water and defining the splash more clearly.
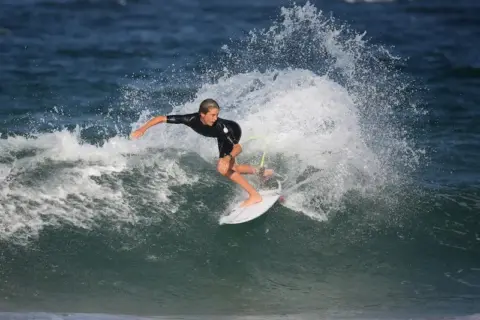

Water Enhancer AI brought out texture and motion detail in the splash while deepening the ocean tones.
Why Luminar Neo Is a Useful Tool for Restoring and Digitizing Old Family Photos
Luminar Neo provides powerful tools for users restoring damaged or faded family photos. Tools like GenErase remove scratches, stains, and blemishes with AI precision. Smart Contrast, Curves, and Dehaze restore vibrance to faded images, correcting years of color loss.
For scanned photos that suffer from blur or grain, Supersharp AI and Noiseless AI help recover detail and reduce noise without destroying image texture.
Neo also includes Upscale AI, which enlarges low-resolution images, making them suitable for printing or sharing digitally.
Family historians also benefit from Neo’s intuitive design. Most adjustments are guided by AI, reducing the need for advanced photo-editing skills.
Even tools like GenExpand can intelligently fill torn or uneven edges.
The best part is you don’t need to be a Photoshop pro. Luminar Neo’s AI-driven tools guide you through the process step by step, so family historians and beginners alike can digitize and preserve their photo archives.
It’s incredibly rewarding to see treasured images of parents or grandparents come alive again with just a few thoughtful edits.
These features make Luminar Neo a strong option for digitizing and restoring photo archives.
New tools: Light Depth and Restoration (Fall 2025 update)
In the fall 2025 update, Luminar Neo added two tools that fit really well with how I already use this software: Light Depth and Restoration. Both continue the theme of making advanced edits more accessible for beginners, without needing a ton of technical knowledge.
Light Depth: shaping light with less effort
Light Depth is essentially the next generation of Relight, but smarter and more flexible. It uses depth information in the scene so I can push light forward or back, which makes it much easier to brighten my subject or keep the background moodier without fiddling with complex masks.
In my own editing, I’ve found it especially useful for:
- Adding a subtle spotlight effect to the main subject.
- Separating foreground and background in portraits and travel images.
- Quickly refining light in a way that feels more natural and three‑dimensional.
It still works best with a gentle hand on the sliders, but overall it feels more intuitive and forgiving than the older Relight tool.
Restoration tool: bringing old photos back to life
The new Restoration tool is aimed at fixing old or damaged photos with far less manual work. If you have family prints or scanned images with fading, dust, or scratches, you can run them through Restoration to clean things up and improve color and contrast in just a few steps.
From my testing and real‑world use, it shines when:
- I want to quickly improve a batch of family or client archive photos.
- The goal is “much better and shareable,” not museum‑level restoration.
- I use it as a starting point, then fine‑tune with my usual tools in Neo.
It will not be perfect for every single image, but for many older photos it gives me a strong head start and saves a lot of time compared to doing everything manually.
Why I Like Luminar Neo so Much
- It’s super fun to use.
- Luminar Neo is really user-friendly (way more so than Adobe software).
- It can add finishing touches to images quickly with a few clicks or sliders that previously took a lot longer in Photoshop.
- Adding a bit of style is also faster and easier with Luminar Neo than with Photoshop.
- It handles tasks that Lightroom can’t (so you don’t need to go to Photoshop) such as:
- Doing a sky replacement
- Adding a texture or bokeh overlay
- Single image faux HDR
- In my opinion, Luminar Neo can even do some things better than Photoshop (like sky replacement, which I rate highly).
- Luminar Neo allows me to focus more on creativity and style than software technique and skills.
- It HELPS me create looks for images that I never would have considered or imagined, again enhancing creativity.
- The end result is that I am more inspired and happier with my finished images!


Even a DigitalCameraWorld review says “some of Luminar Neo’s AI tools are quite remarkable.”
Who Is Luminar Neo For?
Now that you know why I use Luminar Neo, let’s take a closer look and evaluate whether or not it is for you. Luminar Neo isn’t for everyone — but it shines for:
- Beginners and hobbyists who want stunning results without a huge learning curve.
- Travel and landscape photographers who benefit from tools like GenExpand, Water Enhancer, and Sky AI.
- Adobe-weary users who want powerful tools without a subscription.
- Photographers focused more on creativity than complex workflows.
- You are not currently editing your images but you want to and have no idea where to begin.
- You find Lightroom and Photoshop too complicated to learn and use.
- You have an older version of Lightroom or Photoshop and don’t want to pay Adobe monthly to update them – but you know you’re missing out on new tools and technology.
- You want to upgrade from Apple Photos or Windows Photo Editor.
- You primarily use Lightroom Classic and you want to do more advanced things with editing but Photoshop baffles you.
- You want to speed up your existing workflow which includes using Lightroom and Photoshop.
- You like to keep photo edits simple so you can spend less than five minutes on an image.
- You want to spend more time doing photography and less time editing.
- You want to make images that pop and wow your friends and family.
- You already have Lightroom, Photoshop, Topaz, and a few other plugins (meaning you see the value in each of them).
It may not be ideal if:
- You rely on advanced layer-based editing like in Photoshop.
- You need pro-grade cataloging tools (Lightroom still wins here).
Pros and Cons of Luminar Neo

Having said all that, if you’re still with me, in this part of my Luminar Neo review we will take a closer look at what it actually does and how it performs. Keep in mind that Luminar Neo can be used as a stand-alone editor or as a plugin. If you do the latter, it looks and functions a little bit differently.
| Pros | Cons |
| One-time purchase option (no sub required) | Some tools only available via subscription or upgrade pass |
| Intuitive UI — easy for beginners | Catalog tools still basic compared to Lightroom |
| AI tools save time and effort | Gen tools can be hit-or-miss in complex scenes |
| Frequent updates with real value | Extension/plugin system can feel fragmented |
| Powerful masking and portrait tools — v1.27 adds Feather/Shift Edge sliders and improved blemish, body skin, and Bokeh AI | Performance can lag on older systems |
What Luminar Neo does really well – PROS
As I mentioned in my assessment above, there are lots of things to like about Luminar Neo and it does a lot of things really well. The following is a small list of the stuff that I think it excels at:
- It’s easy to add images and get going.
- Presets make it simple to do a one-click edit and call it a day.
- At the same time, the tools are available for more advanced options like layers, local adjustments, sky replacements, and more.
- Tons of Artificial Intelligence (AI) makes it a really powerful tool.
- The tools are sorted in a logical manner – basic tools at the top (do those first), then creative and advanced tools further down (do those later) – this is very useful for beginners!
- The portrait editing tools rock – I’ve tried many so-called automated and AI portrait tools and in my opinion, Luminar Neo’s are the best (also super easy to use). I rate this set of tools as top-notch!
- The v1.27 update made portrait tools even more precise. Blemish removal now has a full slider (not just on/off), body skin smoothing applies to the neck and arms so your edits don’t stop at the jawline, and the dark circle remover has been significantly improved.


- You can do you – meaning whether you prefer a natural look for your editing or one that’s more over the top – you can do either with Luminar Neo.
- It has layers so you can combine images to make composites, or add an overlay.
- It’s super easy to replace the sky or remove a portrait background.
- It does sharpening and noise reduction really well (rating a very close second to Topaz software).
- It has some unique tools that aren’t in any other software that I’ve tried (Super Contrast and Color Harmony to name two) – and they are fast becoming some of my favorite go-to’s.
- Luminar Neo does complete NON-destructive editing – meaning, you can’t ruin your original photos, ever!
- It’s easy to create your own looks and save them as a preset to use on other images.


I could continue to add many more pros to the list above, but I’ll stop there. You have probably already gotten the idea from this Luminar Neo review – I am a fan of it! In fact, I am also a Skylum ambassador – that’s how highly I rate it and how much I like it!


What are its shortcomings – CONS
As with any software, there are always a few cons or shortcomings to go along with the good stuff. But how big of a deal are they for Luminar Neo and are they a deal breaker for you? In this part of the review we’ll discuss and then you be the judge.
At the time of writing this Luminar Neo review, the cons as I see them include:
The lack of a fully functioning UNDO feature. This is necessary and we’re told it’s coming soon.The program can be slow to respond at times.Exporting multiple images at one time is slow.Exporting is up to 30% faster in v1.24.7 allegedly.- There is no ability to edit the metadata of your images (such as adding copyright information, a caption, or GPS coordinates).
- You cannot batch rename your images.
- There isn’t currently a text tool to add text overlays to your images.
- When using a radial or gradient mask, you still can’t reposition it after applying it, you have to undo and start over. However, the new Feather and Shift Edge sliders (v1.27) now let you adjust the mask boundary and softness after the fact, which addresses part of this limitation.
Darlene’s Real-World Take
I used the new Auto Adjust tool on five different types of photos and was really surprised at how well it balanced the whites and highlights — especially on high-contrast images. It’s not perfect, but it’s a great place to start.
Atmosphere AI 2.0 is now smart enough to fog up the background behind a cyclist and leave the subject clear. That’s the kind of depth control that makes a tool go from gimmick to usable.
I tested the cache cleanup tool on a Luminar catalog with just 500 images, and it dropped the size from 35GB to under 5. That’s a real fix, not just a checkbox feature.
Luminar Neo vs Lightroom vs ON1 Photo RAW (Quick Comparison)
| Feature | Luminar Neo | Lightroom | ON1 Photo RAW 2022 |
| Subscription-free option | YES | NO | YES (one-time or sub) |
| AI Tools (GenExpand, GenSwap, Auto Adjust) | YES | Partial (limited masking AI) | SOME (some tools, less intuitive) |
| Cataloging & Organization | SOME, Basic | YES, Pro-level | SOME, Hybrid, less intuitive UI |
| RAW Editing | YES | YES | YES |
| Layer-based Editing | SOME, Limited | SOME, Limited (better in Photoshop) | YES, Fully integrated |
| Plugin Compatibility | SOME, Some plugins | YES, Adobe ecosystem | YES, Works with PS/Luminar/Topaz |
| Sky Replacement | YES, Excellent | SOME, Basic | SOME, Inconsistent results |
| Best For | Creatives, hobbyists | Workflow-heavy photographers | Power users who love deep tools but can handle a learning curve |
One thing I’ll give Skylum full credit for: they’re constantly listening to feedback.
Every few months, we see a fresh update — not just with flashy new features, but with real performance gains, new camera support, and smart workflow tweaks that show they’re paying attention to what photographers actually need.
Final Verdict: Should You Buy It?
If you’ve read this far in our Luminar Neo review, you probably already know: for anyone tired of Lightroom’s complexity, Neo offers a refreshingly powerful alternative in 2025.
It’s not flawless, and some of the GenAI tools still need refinement. But what Skylum has built over the past year shows real momentum, and the value for the price — especially if you grab a lifetime license — is hard to beat.
Save 10% on Luminar Neo
Use discount code DPM10 when you checkout, to save 10% on your entire cart
Luminar Neo Pricing: What Does It Cost?
Let me break down what I know for certain, and explain where there’s still some ambiguity.
If you have an active subscription
Subscriptions are no longer available to new buyers. If you have one, keep it. That is my strong recommendation.
If your Skylum account shows an active monthly or annual subscription, you get the v1.27 spring update for free. Everything is included. No extra charge.
If you bought the Fall 2025 upgrade pass
You also get this update. You may need to pay separately if you want the Ecosystem (which adds Luminar mobile and Spaces) and your fall pass did not include it.
If you have a perpetual or lifetime license
A perpetual license means you own the version you bought, for life. It does not mean you get free updates forever.
If you bought Luminar Neo two years ago on a perpetual license and have not paid for any upgrade passes since, you have that version. It will not change, but you will not get anything new without buying an upgrade pass.
There are two pass options for this update:
| Pass | Price | What’s included |
|---|---|---|
| Basic Upgrade Pass | $49 USD | All tool improvements + Gen Erase, Gen Expand, Gen Swap, and Restoration through end of 2026 |
| Ecosystem Upgrade Pass | $69 USD | Everything in Basic + Luminar mobile app + Spaces (cross-device editing) |
Note: the Fall 2026 update is not included in either pass. You can decide on that one when it arrives.
One thing I want to note: it is my current understanding that the tool improvements themselves (portrait updates, Bokeh AI, masking sliders) are free for all Luminar Neo users regardless of license type.
But I asked this question of several people at Skylum and got different answers, so do not take that as confirmed. Check your account to be sure.
If you are buying Luminar Neo for the first time
There are three options at the time of writing:
- The base perpetual license includes Luminar Neo only.
- The next tier adds cross-device editing and the Ecosystem.
- The top tier (Max) adds extra assets including skies, presets, and overlays. If you want help getting started quickly, the Max package gives you more to work with out of the box.
Always check the Skylum website for current pricing. Sales and specials change, and the page may show a discount that is not reflected in the base prices above.
Try or Buy Luminar Neo
We recommend buying Luminar Neo directly from Skylum using the link below — and if you use our code DPM10, you’ll save 10%.
Save 10% on Luminar Neo
Use discount code DPM10 when you checkout, to save 10% on your entire cart
Want to Learn Luminar Neo Fast?
If you’re ready to start using Neo (or already own it), check out my complete Luminar Neo Online Course — updated for 2025 with lessons on every major new feature.
You’ll learn:
- How to set up your catalog and backups
- What every tool does (with demo photos)
- How to make edits that don’t look overdone
Conclusion
It is my hope that this Luminar Neo review has helped you make a decision on whether or not to add it to your digital workflow. If you DO choose to buy Luminar Neo, remember to use my discount code DPM10 (*affiliate link) to save money when you checkout.
Overall, I rate Luminar Neo 4 out of 5 stars.
Yes, there are a few things that bug me about it, but in the bigger picture it does what I want it to do and it does it well. I’m excited to see where Skylum takes it and I’m in for the long haul.
Cheers,

