
Buying a camera tripod can feel more confusing than it should be. So many models, materials, and price points, it’s easy to get overwhelmed. What are the pros and cons of using a tripod? Which features really matter, and how do you choose the right one for your gear and style of photography?
In this guide, I break it all down: when you actually need a tripod, what to avoid, and how to pick one that supports your camera and your workflow without the stress.
TL/DR: Buying a tripod doesn’t have to be overwhelming. This comprehensive guide walks you through when and why to use a tripod—for sharper, more stable images in low light, long exposures, group shots, macro, and landscape photography. It highlights key considerations like weight capacity, leg construction, tripod head types, and portability. The article also explains pros (image sharpness, consistency) and cons (bulk, setup hassle) of using tripods. Recommendations include starting with a sturdy all-in-one model under $150 for beginners, and upgrading to a modular setup as your needs grow.
When should a tripod be used?
A tripod should be used any time you need stability and sharpness beyond what handheld shooting can offer. This includes:
- Low Light and Night Photography: Use a tripod when shooting in dim conditions, indoors, or at night to prevent blur and avoid raising your ISO, keeping your images clean and noise-free.
- Long Exposures: For techniques like light trails, blurred water, or creative night scenes, a tripod is required to keep the camera steady during extended shutter speeds.
- Group and Portrait Photos: Use a tripod to frame shots of people and large groups, allowing you to focus on connecting with your subjects and achieving better expressions.
- Consistent Framing: When shooting multiple images for HDR stacking, focus stacking, or panoramas, a tripod ensures each frame is aligned perfectly.
- Macro and Landscape Photography: For razor-sharp landscapes or detailed close-ups, the tripod minimizes even tiny movements, letting you fine-tune composition and focus.
- Intentional, Thoughtful Shooting: Putting your camera on a tripod encourages you to slow down; check your settings, light, and composition, helping you “shoot with intention” rather than rush through the process.
Even experienced photographers benefit from using tripods more often than they think.
If you want consistently sharp results and professional-quality photos, make using your tripod a default unless it’s truly impractical (like fast-moving action). Over time, you’ll notice improved image quality and a more mindful approach to photography.
Most beginners skip this and regret it later. This single step shifts your entire workflow. You’ll notice the difference immediately.


While tripods offer important benefits, they also have a few drawbacks. Here’s a quick overview to help you decide if and when they fit your needs
What are the pros and cons of using a tripod?

Pros
- Enables sharp photos in low-light and long exposures
- Helps compose and align images precisely
- Useful for group shots, landscapes, macro, and more
- Encourages slower, more thoughtful photography
Cons
- Bulky to carry; requires setup time
- May slow you down for fast-moving scenes
- Cheap tripods can be unstable or frustrating
- Cheap tripods risk potential damage to your equipment if it collapses or sinks.
- Not always practical for travel or spontaneous shooting
How to Choose Your Tripod: A Simple Step-by-Step Guide
Choosing a tripod doesn’t have to be complicated. I own three different tripods myself, each for different situations, and I learned what matters (and what doesn’t) through trial and error so you don’t have to.
Let’s break this down into manageable steps.

Step 1: Start with Weight Capacity (The Only Must-Have)
This is the single most important thing to get right.
Your tripod needs to hold your camera and lens safely. Without wobbling, creeping, or (worst case) collapsing.
Here’s what to do:
- Weigh your heaviest camera + lens combo (or look up the specs online)
- Choose a tripod rated for 1.5 to 2 times that weight
- Leave room to grow (you might add a flash, battery grip, or heavier lens later)
Example: If your camera and lens weigh 5 pounds together, look for a tripod rated for at least 7-10 pounds.
This information is always listed on manufacturer websites and in good camera stores. Just ask, “Will this hold my {camera model} with a {lens type}?” They can tell you immediately.
Step 2: Decide Between All-in-One or Modular
When you’re shopping, you’ll see two types of tripods:
| All-in-One Tripods | Modular Systems |
|---|---|
| Legs and head come together as one unit | You buy legs and head separately |
| Simpler to start with | More flexible and upgradeable |
| Usually $100-$200 | Usually $300-$500+ |
| Best for: First-time buyers, casual use | Best for: Photographers ready to invest, those with specialized needs |

My recommendation:
First tripod ever? Start with a good all-in-one model. Use it for 6-12 months. You’ll learn what you like, what drives you crazy, and whether you even use it enough to justify upgrading.
Ready to upgrade? Go modular. You can mix and match brands, swap heads for different photography styles, and replace just one piece if something breaks or your needs change.
Step 3: Choose Your Tripod Head
The head is what actually holds your camera and lets you adjust angles. There are five main types, but most photographers only need to know about two:
Ball Head (Most Popular)
- One knob controls everything
- Quick to adjust
- Works for most photography styles
- Best for: Landscapes, travel, general use
3-Way/Pan-Tilt Head
- Separate controls for horizontal, vertical, and rotation
- More precise but slower to adjust
- Best for: Portraits, product photography, careful compositions


Other Specialized Heads:
- Pistol Grip: Trigger-style release (love it or hate it, try before buying)
- Gimbal Head: For super heavy telephoto lenses (bird/wildlife photography)
- Panoramic Head: For stitching multiple images together
Important: Make sure your tripod head can hold the same weight as your legs. The head is often the weakest link, don’t go cheap here.
One Feature You’ll Love: Quick Release Plates
Look for a head with a quick release plate system. You attach a small plate to your camera once, then just click it in and out of the tripod head. No more screwing and unscrewing every time you set up.
This single feature will save you so much frustration.
Step 4: Pick Your Leg Features (Without Overthinking)
Here’s where it gets detailed, but don’t worry, I’ll tell you what actually matters.
Material: What Are the Legs Made Of?
| Material | Weight | Durability | Price | Best For |
|---|---|---|---|---|
| Aluminum | Heavy (5-6 lbs) | Very durable | $ | Studio work, car-based shooting |
| Carbon Fiber | Light (3-4 lbs) | Extremely durable, won’t rust | $$$ | Hiking, travel, frequent use |
| Basalt | Medium (4-5 lbs) | Durable | $$ | Good middle ground |
My advice: If you hike more than 10 minutes to your shooting location, carbon fiber is worth it. Otherwise, aluminum is perfectly fine and much more affordable.
Leg Locks: Twist or Flip?
You’ll see two styles:
- Twist locks: Twist to unlock/lock each leg section
- Flip locks: Flip a lever to unlock/lock
This is purely personal preference. Go to a store and try both. See which feels easier and more intuitive to you. Neither is better, just different.
Warning: If choosing flip locks, check that they’re metal, not lightweight plastic. Plastic clips break easily and loosen over time.
Number of Leg Sections: 3, 4, or 5?
More sections = more compact when folded, but slightly less stable when fully extended.
- 3 sections: Sturdiest, but longer when folded
- 4 sections: Good balance (this is what I use most)
- 5 sections: Most compact for travel, slightly less stable
Consider:
- How do you travel? (Car? Airplane? Backpack?)
- Do you need it to fit in luggage?
Measure your suitcase or camera bag before shopping if portability matters. My 4-section carbon fibre tripod will fit diagonally in my suitcase, with the tripod head tilted to the side or removed.
Note: This is a good reason why you want to go to a store and not buy online as well. Something may look like a good deal, and have great features on paper but if it’s doesn’t stand up to the lean test and is clumsy to set up you’ll end up hating it and back at square one looking for a new one.
Height: Can You See Through the Viewfinder Comfortably?
Fully extended, your tripod should reach at least chin height WITHOUT using the center column.
Why? Because extending that center column seriously reduces stability (it’s like putting a monopod on top of your tripod).
If you’re buying legs separately: Look for legs that reach shoulder height or higher.
If you’re buying an all-in-one: Make sure the whole setup reaches chin height minimum.
For shorter photographers (like me at 5’0″): This is easy. For taller folks (6’+), pay extra attention to maximum height specs.
Minimum Height: How Low Can It Go?
Check if the legs splay out wide or fold down completely flat. This matters for:
- Ground-level macro shots
- Low-angle landscape compositions
- Shooting from unusual perspectives
Not critical for everyone, but nice to have if you like creative angles.
Center Column: Use It or Lose It?
Many tripods have a center column that extends for extra height. I recommend NOT using it for added height because it kills stability.
But center columns ARE useful when:
- They’re reversible (mount camera upside down for ground-level shots)
- You need to make small height adjustments quickly
Some photographers remove the center column entirely for maximum stability.
Step 5: Consider Special Situations
If You Travel Frequently:

Look for:
- Carbon fiber legs (lighter to carry)
- 4-5 leg sections (more compact)
- Folded length that fits diagonally in your suitcase
- Or consider a Gorillapod (flexible mini-tripod with bendable legs that wrap around poles, railings, etc.)
Travel tip: Many tourist sites that ban tripods will allow monopods or small flexible tripods. Check ahead.
If You’re Mostly Stationary (Studio, Local Parks):
Look for:
- Maximum stability over portability
- Aluminum is fine (save money)
- Fewer leg sections (sturdier)
- Heavier is okay, you’re not hiking with it
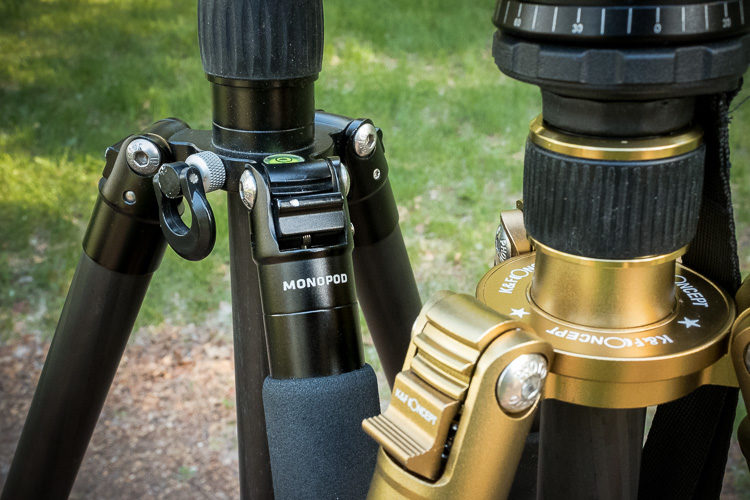
Here are a few different styles of tripods you can choose from.
Tripod Reviews
If You Shoot Video:
Do NOT buy a regular photo tripod head. Video heads are designed for smooth panning motion and often don’t lock firmly in place. You need a specialized video fluid head.
Common Tripod Mistakes (And How to Avoid Them)
Your Simple Buying Checklist
Print this out and take it to the store:
The Lean Test: Set up the tripod fully extended. Put your hand on top and lean GENTLY with some of your weight. It should not wobble, slip, or feel unstable. If it does, keep shopping.
My Personal Tripod Recommendations by Experience Level
First-Time Buyer
Budget: $100-150
What to get: Sturdy all-in-one tripod with ball head and quick release
Why: Learn what you actually use before investing more. This will teach you what matters to you.
Example types to look for:
- Manfrotto Compact series
- Vanguard Alta series
- Amazon Basics (yes, really. Their mid-range model is surprisingly decent for beginners)
Intermediate: Ready to Upgrade
Budget: $300-500
What to get: Modular system. Quality legs + separate ball head
Why: More versatile, lighter options (carbon fiber), will grow with your skills
What I use for travel: 4-section carbon fiber legs with a compact ball head. Fits in my suitcase diagonally, weighs almost nothing, and has never let me down.
Advanced/Specialized
Budget: $500+
What to get: Premium modular system tailored to your specific needs
Why: You know exactly what you shoot and need specialized features
This might include:
- Heavy-duty legs for studio portraits
- Ultra-light carbon fiber for wilderness backpacking
- Gimbal head for wildlife photography
- Panoramic head for landscape stitching
Final Thoughts: You Can’t Get This Wrong
Here’s what I want you to remember:
You cannot make a “wrong” choice if you follow these guidelines.
The perfect tripod doesn’t exist. Only the right one for where you are right now in your photography journey.
I own three tripods because my needs are different depending on the situation:
- Heavy, sturdy tripod for portrait sessions (barely moves, very stable)
- Light carbon fiber for travel and hiking (my most-used)
- Flexible mini tripod for tight spaces and travel restrictions
You might start with one and end up with three. Or you might use one tripod happily for ten years. Both are fine.
Start Here:
If you’re feeling overwhelmed, start with a good $100-150 all-in-one tripod. Use it for a few months. You’ll quickly learn:
- How often you actually use it
- What frustrates you about it
- Whether you need something lighter, sturdier, or more specialized
Then, and only then, consider upgrading.
The worst tripod is the one you leave at home because it’s too annoying to use. Start simple, and build from there.
Quick Reference: Tripod Terms Explained
Ball Head: Tripod head with one main knob that controls all movement
3-Way Head: Tripod head with separate controls for each direction
Quick Release Plate: Small plate that attaches to your camera for fast mounting
Load Capacity: Maximum weight the tripod can safely hold
Leg Sections: How many collapsible segments make up each leg
Center Column: Extendable post in the middle of the tripod (avoid using for added height)
Modular System: Legs and head sold separately so you can mix and match
Flip Lock: Lever-style leg locks
Twist Lock: Rotating-style leg locks

Remember: The goal isn’t to buy the “best” tripod. The goal is to buy one that you’ll actually USE, one that fits your shooting style, your physical comfort, and your budget right now.
You’ve got this.
Cheers,

