
In today’s world, a well-crafted professional headshot can be a powerful tool. It’s the first impression people make on potential clients, partners, or employers. A great business headshot can convey professionalism, confidence, and authenticity. A good personal one flatters the subject and shows their personality.
Whether you’re photographing a corporate executive, a small business owner, or a friend for their Facebook profile, understanding the art of capturing the perfect headshot is crucial. Here are the essential tips to ensure your headshots are top-notch.
Key Takeaways
- Professional headshots are important for making a strong first impression in various contexts.
- Use neutral backgrounds like white or gray for timeless headshots, but unique colors can work for branding.
- Position the subject away from the background to create depth in the photo.
- Lighting is crucial; even distribution, no harsh shadows, and avoiding low light are key.
- Adjust white balance to ensure accurate colors in headshots.
- Framing should focus on the face and eyes; 2/3 of the image space for vertical framing.
- Expressions should align with the brand or personality; confident and simple poses are often best.
- Clothing should reflect the subject’s professional or personal image and brand.
- Avoid clothing with loud patterns, neon colors, or oversized items.
- Paying attention to lighting, background, expression, framing, and clothing creates compelling headshots.
Choosing the perfect background for your headshot
When thinking about classic headshots, for many a gray background and smiling face comes to mind. If you are creating timeless headshots, sticking to neutral colors like white and gray are the best choices.


Any other color can work, even fun colors like yellow and pink, but they are only appropriate for individuals who have unique brands and are looking to stand out. Plain solid-colored backgrounds work great, too, especially for larger groups of people who need identical photos for their company.

Be sure to position the subject several feet away from the background so that the photo has a nice depth. This way they are the main focus (which is essential for a good headshot) and the background texture will not be visible (if it has small creases or smudges).
Table 1: Background Choices for Headshots
This table can visually compare different background choices for headshots, highlighting the suitability of each background type for various professional or personal branding needs.
| Background Color | Ideal Use Cases | Notes |
|---|---|---|
| White | Timeless, classic headshots | Best for traditional corporate looks |
| Gray | Professional, neutral look | Works well in most settings |
| Blue | Making the subject stand out | Good for creative or dynamic brands |
| Yellow/Pink | Unique personal brands | Suitable for standing out |
| Outdoor Setting | Showing geographical context | Great for city-based professionals |
| Work Environment | Showcasing professional environment | Ideal for personalized brand stories |
Note from Darlene: This is why a large aperture and a short to medium telephoto lens are often used for close-up portraits, it helps to make the background out of focus.

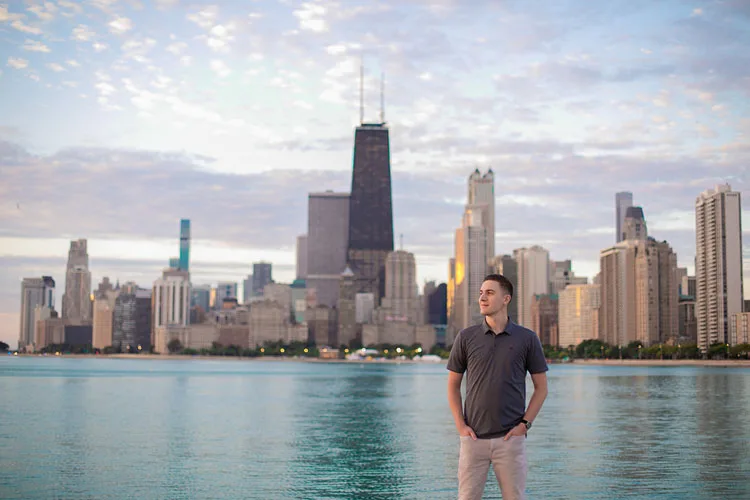
You can also create a headshot photo with an outdoor background or the work setting (such as an office or a warehouse) if the client requests so as part of their unique brand or message. Outdoor headshot photos are particularly popular in bigger cities like New York and Chicago, where distinct cityscapes can add character to the photograph and communicate its geographical location.
When setting up, choose a location that has great light and the background is not too cluttered or distracting. Use a low f-stop (a wide opening like f/1.4-f/2.8) so that the background has a nice blur or bokeh and the person is the center of attention.
Professional headshots and the importance of lighting
The right lighting can make or break your headshots. Not enough or poor quality of light can make the subject look blurry, show unwanted skin imperfections, add years to age them, and generally make the photo unattractive.

No matter what techniques you use to accomplish the lighting it must be evenly distributed across the face. There should be no harsh shadows or any white glares.
The light should usually be positioned slightly above the head (the exception is someone with a bald head, you don’t want to highlight it). You never want the light too low which will highlight a double chin and make them look heavier. Really low light is called monster lighting (making them look like they’re telling a ghost story with a flashlight in the dark) and should be avoided.
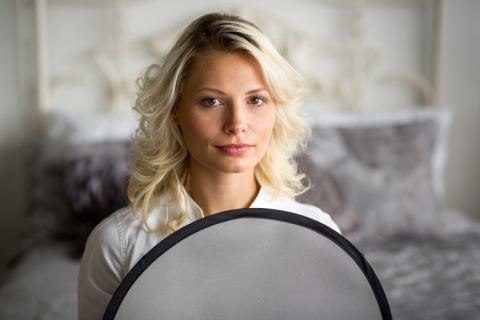
If you notice that the subject has harsh shadows, you can use a simple tool like a reflector or even a white cardboard sheet to fill in the dark areas. All you have to do is position the reflector on the opposite side of the source of light (again avoid putting it under the chin).

If the headshots are taken outdoors, avoid direct sunlight by moving into the shade or using a diffuser screen (usually a reflector will have one included) to hold over their head and create nice soft even lighting.
Read more: What is Quality of Light and How to Use it to Take Better Photos
Mastering White Balance
White balance is an important concept in photography and is especially crucial for accomplishing the best looking professional headshots.
White balance refers to the hue or color of an image and scene. Your camera has a setting you can use to ensure that white objects or parts of an image appear truly white and that all other colors are accurately represented.
Different light sources can have different color temperatures, which can result in the same object appearing in varying color tones.
Read more: How to use Camera White Balance to Improve Your Photos

For example, a white t-shirt will look more yellow in the sunlight, while it will likely look more blue in indoor LED lighting.
If the camera’s white balance is not properly adjusted to match the light source, the resulting image may have a color cast, making whites appear with a tint of another color, such as blue, yellow, green, or red. In headshots, unbalanced whites also mean unnatural skin tones.

Table 2: Lighting and White Balance for Headshots
This table explains the importance of lighting and white balance in professional headshots, detailing how different settings affect the final image.
| Aspect | Importance | Tips for Best Results |
|---|---|---|
| Indoor Lighting | Even distribution across the face | Use natural light or soft artificial light |
| Outdoor Lighting | Avoid direct sunlight; use diffusers | Seek shaded areas or use reflectors |
| White Balance | Ensures accurate color representation | Adjust manually or with photo editing tools |
| Harsh Shadows | Avoid to maintain natural look | Use reflectors to fill dark areas |
| Low Light | Avoid to prevent unflattering shadows | Position light slightly above head level |
White balance can be adjusted manually in your camera or adjusted during post-processing using your favorite photo editing software (i.e. Luminar Neo, Lightroom, etc.). By selecting the appropriate white balance setting or manually adjusting it, you can ensure that the colors in the photos appear accurate and true to life, which is particularly important for achieving natural results in headshots.
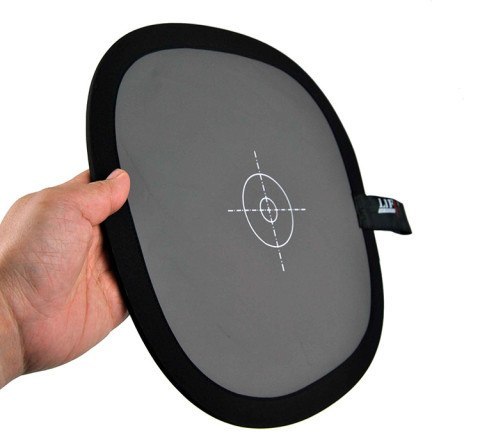
An easy trick to use on-set is to bring a gray card and have the subject hold it up for one photo. Once you edit the photo, you can place the white balance dropper tool on the gray card to fix the color in seconds.
Read more: How to Use a Gray Card for Custom White Balance and Metering.
Focus and Framing of your headshots
A classic business or casual headshot is typically framed from the chest up, with the face centered in the frame. This framing allows viewers to focus on the individual’s facial expressions. You can also frame 3/4 of the upper body or even do a full-length (head-to-toe) composition.
The key to these types of photos is for the subject to take up 2/3 of the entire image space if it is vertical. If the image is horizontal they could be placed either in the center or on the left or right third of the photo (rule of thirds).
The focus should always be on the face and eyes, as these are the most expressive and defining features of a person and their individuality.


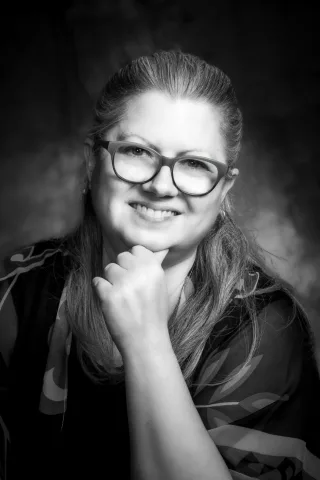
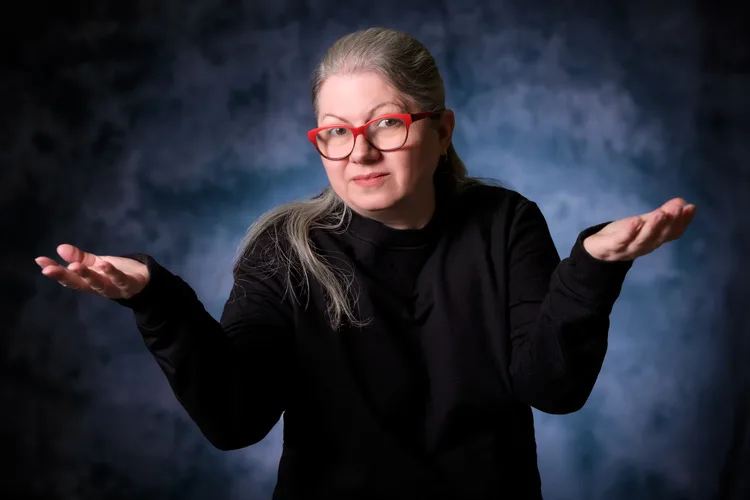
Expression and Posing
The expression on your subject’s face should be determined by the message that needs to be conveyed about the brand they are representing and/or their personality. A confident neutral expression or a nice confident smile is a great option for most headshots.
Keep posing simple. After all, the face is the most important part of the headshot, so sophisticated poses are unnecessary. For a simple headshot, having them center their head and body in front of the camera is a great starting point.

To help make the subject appear a bit slimmer, have them turn their body slightly to one side but keep their head squared with the camera. Have a chair ready to sit in when doing these poses, as people are a lot more relaxed while sitting down for photos.
Note: Position the camera lens at or just above eye level for the most flattering images.

After you get the classic headshot and the subject wants other images, you can go through a variety of poses with arms crossed, propping their chin with one hand, or leaning on something. Be sure to create a welcoming and friendly environment, so that the subject feels at ease and the expressions and poses come naturally to them.
Clothing Choices
The subject’s clothing should align with their professional or personal image and brand. In most cases, business professional attire is a safe choice. However, the level of formality can vary depending on the brand and industry. For some, a business portrait is required while for others, a more casual look can be more suitable and relatable.
It is important that the clothing reflects their identity and resonates with their target audience.

Something to keep in mind is while you want to encourage your subjects to express their personality, some clothing does not photograph well. Examples are loud patterns, graphic designs, neon colors, oversized items, and clothing that is too tight. Be sure to communicate that to the subjects before the photo session, so they can be prepared with the right clothing, or bring multiple options from which to choose.
Conclusion
In conclusion, the right lighting, background, expression, framing, and clothing are essential elements in creating powerful and compelling professional headshots. By paying attention and practicing these aspects, you can represent your subjects, clients, friends, and their brand/style in the best possible light (pun intended).
